Supply and demand trading: How to piggy-back institutional investors
Most of us are all too aware of how supply and demand works … it’s how the war in Ukraine has made the price of pasta double … and why the hand sanitizer I bought at the beginning of the pandemic cost more than a bottle of Champagne.
You’re probably already applying some principles of supply and demand to your trading by looking at support and resistance levels …
… but supply and demand trading takes that further, giving you leading information about turning points, before prices even reach a key level. And this is particularly useful for small investors, who have the flexibility that big players can’t enjoy.
How supply and demand functions in the markets
Put most simply, when the price of an instrument becomes considered too expensive, supply will outstrip demand, and the price will drop off. Likewise, when an instrument is regarded as ‘cheap’, demand will surge, and we’ll see prices rise.
These stories are littered all over our charts as prices bounce between highs and lows …
But I want to dig into the serious supply and demand trading levels which drive price behaviour … and that we can use to our advantage.
What’s going on in the major supply and demand trading zones
For most of us, if we want to buy into a market, we’ll just click the ‘buy’ button on our trading platform … but if you’re a bank or major financial institution, it’s not that simple.
They are buying in quantities that can move markets. So, if they jump in all in one go, they’ll drive the price upwards, and not get their order fulfilled at the price they want. Instead, they’ll need to enter in stages … buy a bit, wait for the price to settle … buy a bit more … and so on.
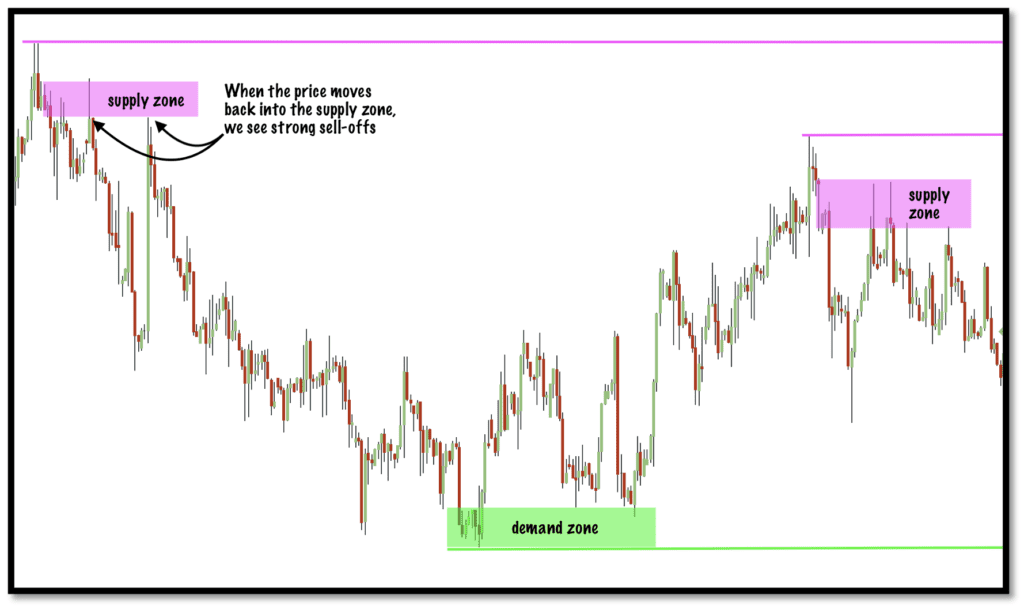
This behaviour forms a consolidation area around major turning points. Take a look at some price charts, and you’ll see this going on wherever the price makes a significant turn.
Bear in mind that we’re looking at major indices and forex markets here, so these are huge, liquid instruments … it takes an immense amount of buying or selling power to turn these beasts. And that’s exactly what we’re seeing here.
So, if we zoom out, we can see how these zones work on our charts …
What you need to know when assessing supply and demand zones
Look for glaringly obvious turning points – they should jump out at you.
Look for strong moves into the zone, and a strong move away from the zone.
That tell-tale consolidation area where institutions are building their positions is our key to drawing ‘zones’ rather than just support and resistance lines.
Each time a supply/demand zone is hit, there will be more orders taken out, so the levels will naturally weaken. You may notice the price move out of the zone become less decisive – this is a sign that your supply/demand zone is running out of power.
How to use supply and demand zones
Importantly – supply and demand zones are NOT a trading strategy, they are NOT an indicator and they are NOT a signal to enter the market.
But that doesn’t mean they aren’t really powerful and an incredible tool that will put several steps ahead of many other traders – and a few miles ahead of your average novice trader.
If you have major supply and demand zones marked up on your charts, you can use them to:
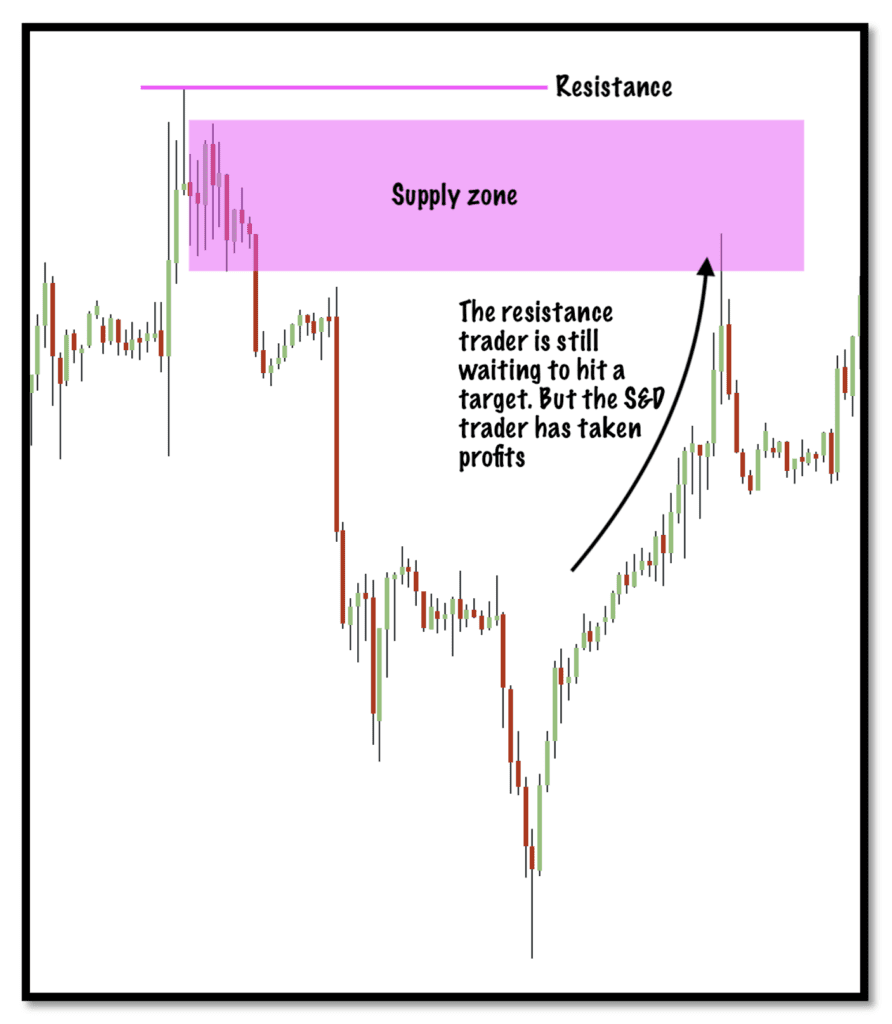
Make an early exit: don’t wait for a support/resistance line to be hit before taking your profits. While the support/resistance trader is getting squeezed, the supply/demand trader has already taken profits.
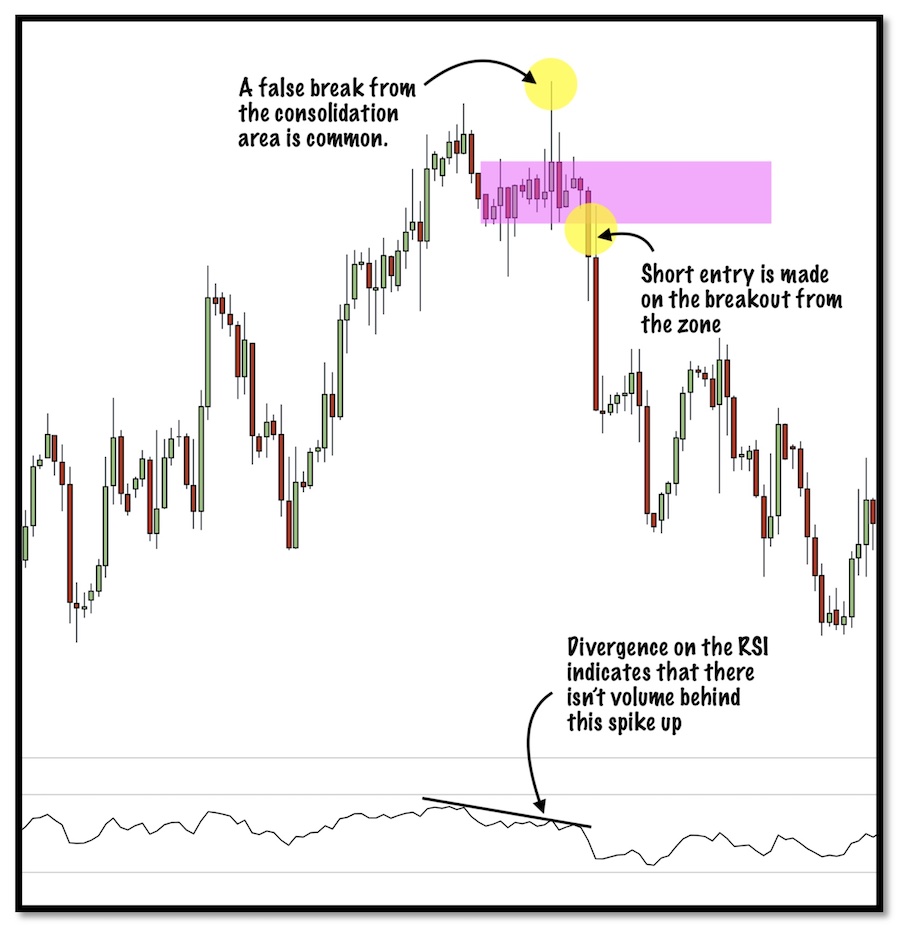
Time your reversal trades: knowing that a major turn will come with some consolidation means you can take your time and enter the move as it breaks out from the zone – this is where the move will be really accelerated.
Beware of the false breakout to the wrong side of the consolidation – this is often a move to clear out a few more orders in the markets. Check momentum and volume – for more information on these fakeouts, please check out my post on bull and bear traps.
By thinking in terms of supply and demand trading zones, you’re automatically factoring in the big players to your trade dynamics. These are the market movers – it’ll make you more attuned to stop-hunting and smarter about the entry and exit levels you set.
All in all, it’ll shift you up from novice to serious in your trading …










2 comments
Eric
Very useful and well explained. Thanks.
Mark
Thanks for the feedback Eric. I hope you’re able to apply this practically to your trading – be interested to hear how you get on.